Shrink Wrapping Patio Furniture Will Protect It from Snow, Pests, and More!
Your patio furniture makes so many good times possible during the warm months. Therefore, it’s important to protect those furnishings during the offseason.
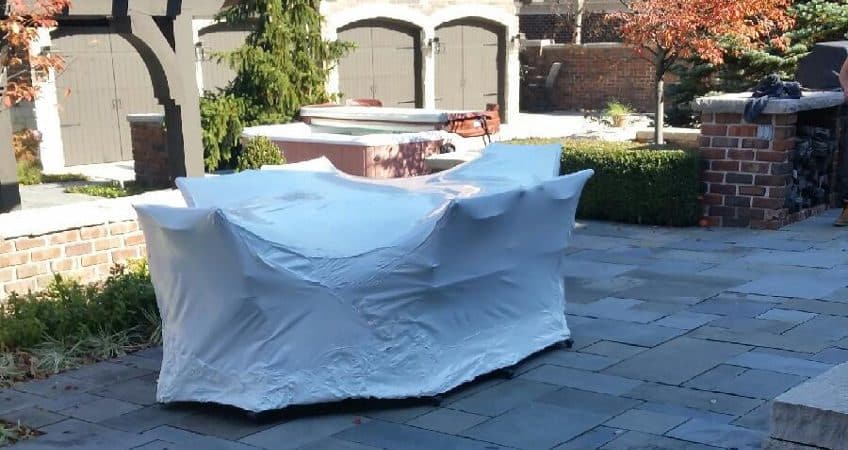
While there are many options for outdoor furniture storage available, few options stand up to the protective power of shrink wrap.
In this post, we will explain why shrink wrap is the most effective storage option during the winter, moves, and more. Then we will give you step by step instructions for shrink wrapping patio furniture like a pro.
What Are the Benefits of Shrink Wrapping Patio Furniture?
You will most clearly see the benefits of furniture wrap in the winter and during a move. These two situations are when outdoor furnishings are most vulnerable to damage from the elements.
However, as we will see, shrink wrap neutralizes these threats due to its durable and watertight design.
Wrapping Outdoor Furniture for Winter is Convenient
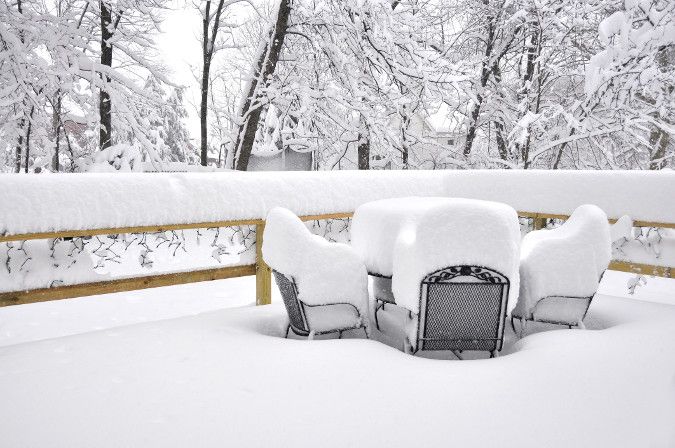
Winter brings all sorts of weather conditions that can damage unprotected furniture. For example, the excess moisture from melting snow can lead to corrosion and other damaging problems.
Furniture featuring soft materials, such as fabric upholstery, cushions, or pillows, is especially vulnerable to these problems. The moisture, temperature changes, and dirt from melting ice will warp those materials and leave you with a headache come springtime.
Typically, homeowners will combat these problems in one of the following ways:
- Placing it in storage
- Putting it in their garage
- Throwing a tarp over it
However, all these solutions come with their drawbacks:
- Storage facilities are expensive.
- Putting the furniture in your garage can overcrowd your garage.
- A tarp is not completely waterproof.
Shrink wrap, on the other hand, makes all these problems disappear!
It allows you to leave your furniture right on your patio. Therefore, you won’t have to pay for storage or overcrowd your garage.
Furthermore, unlike a tarp, shrink wrap consists of durable material that will adhere tightly to your furniture. This design is excellent at keeping out the elements, and it won’t blow off even in the strongest of winds.
In short, you can shrink wrap furniture and leave it on your patio until spring. Then, once spring comes, you can cut away the wrapping and enjoy your furniture in the same condition it was before. It’s that simple and convenient!
Wrapping Outdoor Furniture for a Move is Secure
There are all sorts of risks that come with moving furniture from one home to another. For one thing, you never know what damage the furnishings could incur in the moving truck.
Plus, if you’re planning on putting the furniture in storage, you never know how the conditions in the storage area may fluctuate. There’s always a chance that humidity, dust, or pests could damage your furniture when you’re not looking.
The last thing you want is to open the moving truck or storage unit and find your furniture covered in scuffs or rat droppings!
Fortunately, shrink wrap can prevent all those problems with its durability. At Unlimited Shrink Wrap, we install shrink wrap made of high-quality polyethylene on all outdoor furniture. The thick material is strong enough to shield the furnishings from any scratches and keep out any moisture or pests.
It will ensure your move goes smoothly and that your furniture comes out perfect on the other side!
How Do You Shrink Wrap Patio Furniture?
Now that you understand the benefits of shrink wrapping patio furniture, you probably want those benefits for yourself! It’s only natural.
That’s why we’ve put together this step-by-step guide on how to shrink wrap patio furniture like the pros.
As you read this guide, keep in mind that shrink wrapping can be dangerous because it involves a lot of heat. So, if you don’t have experience operating shrink wrap equipment, then we would recommend leaving it to the pros.
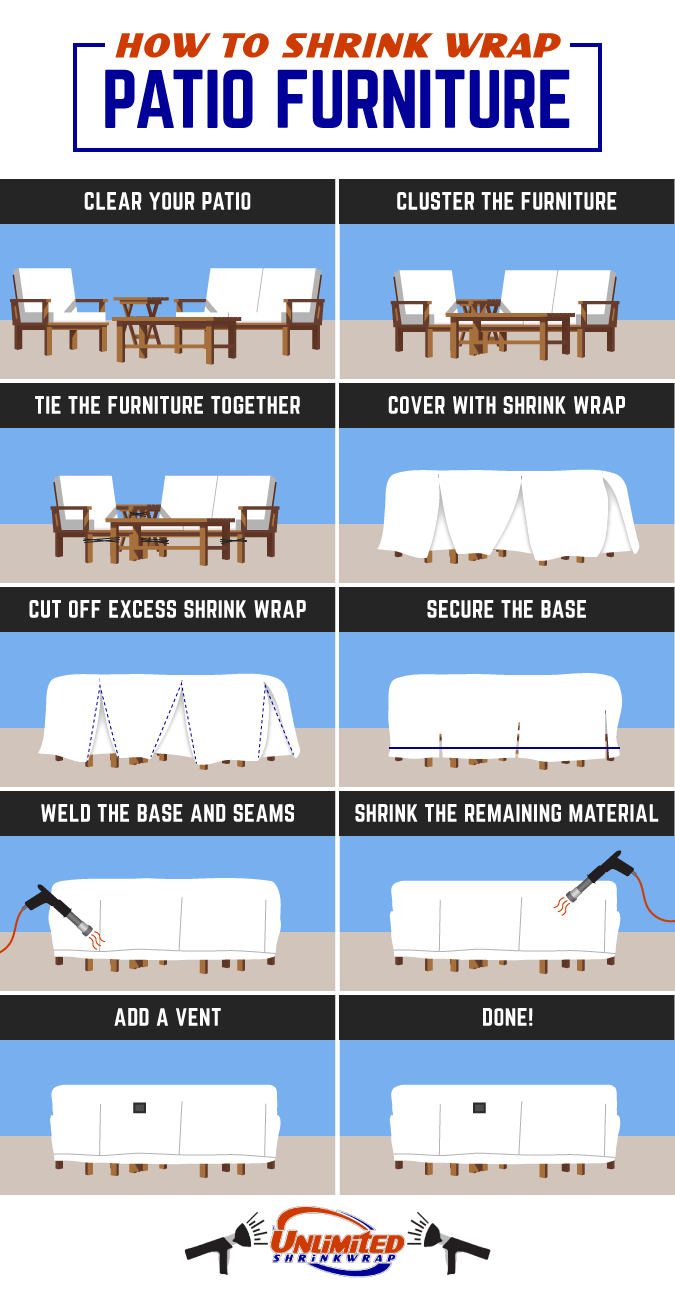
Step 1: Clear Your Patio
First, you want to clear the deck or patio so that there’s plenty of room to move around the furniture. Not only is this step practical for convenience, but it is also crucial for fire safety. You can never be too careful when operating a hot shrink wrap gun!
Step 2: Cluster the Furniture
Next, you want to assemble your furniture into a cluster to make it easy to wrap. If your patio furniture consists of a table and chairs, you should first drape a layer of shrink wrap material over the table. Then you can stack the chairs on the table upside-down. Doing this will prevent the furniture from rubbing together and creating scratches.
Step 3: Tie the Furniture Together
Next, you should tie all the pieces together and cover any sharp corners or edges in padding. This step will keep the contents secure and prevent corners from piercing the wrap.
Step 4: Cover with Shrink Wrap
You should then roll the shrink wrap film off the rack directly over the furniture. It’s important to avoid letting the material touch the ground so that it doesn’t pick up any dirt or debris.
Step 5: Cut Off Excess Shrink Wrap
Next, cut off the excess material at the corners so that seams line up. You can then tape these corners to hold them in place.
Step 6: Secure the Base
After this, secure the base of the shrink wrap with a perimeter band. You should tighten it with a buckle and strap tensioning tool.
Step 7: Weld the Base and Seams
Once the base is secured, you can weld the base and seams of the wrap with a heat shrink wrap gun.
Step 8: Shrink the Remaining Material
After sealing the base and seams, you should shrink the remaining material using the heat gun.
Step 9: Add a Vent
Finally, you should install a vent to maintain consistent air quality inside the shrink wrap and patch up any holes that occurred.
Need Help Shrink Wrapping Patio Furniture in McHenry, IL?
If this all sounds too complicated, then let the professionals make it easier for you! Unlimited Shrinkwrap can shrink wrap outdoor furniture, boats, industrial equipment, and more! Contact us for a quote for on-site shrink wrapping in McHenry, IL, and the greater Chicago area!
Editor’s Note: This blog was originally published on April 20, 2018, and updated on November 11, 2019.


